Clay Art for Beginners
Introduction
The course consists of 3 classes with an additional (optional) class that requires additional tools. During each class students will learn a particular technique and use that technique to make several objects, depending on their preferences: pendants, necklaces, brooches, pins, refrigerator magnets, wall hangings, etc.
Ages: 10+ (use of knife is required.)
Required tools and materials:
- Polymer clay, at least 3 colors. The colors should look good together, yet, have some contrast – see photo. If the colors are too close together, you wouldn’t be able to see the pattern. One 2-oz packet of each color; is enough for a class and you will probably have some left for the next class if you decide to use the same color. Polymer clay SCULPEY III is recommended. It can be purchased at Michaels (https://www.michaels.com/2oz-sculpey-iii-oven-bake-clay/M10132638.html), Jo-Ann Fabric; Amazon probably carries it, too.
- Working surface: a placemat or flexible cutting board work best. Do not use thin disposable tablecloth – it will slide when clay sticks to it.
- Clay roller. (https://www.michaels.com/clay-roller-by-artminds/10085718.html) If you don’t have one, any cylindrical glass or plastic object – like a wine bottle – will do.
- Knife. You can use a kitchen knife and clean it in dishwasher afterwards. The knife does not need to be very sharp, but should have a straight edge. Serrated or plastic knives will not work.
- Paper towels and rubbing alcohol for clean-up.
- Baking surface: old baking tray, ceramic tile, or a glass or metal plate will work. The clay is nontoxic, but you probably don’t want to use the same tray you use for baking.
- Turkey bag. You will use it to put your pieces in the oven to protect the oven.
- Jewelry findings, depending on what you’re going to do: a piece of string for a pendant, pin for a brooch, hooks for earrings, etc. You can also purchase these later; you will need them when the pieces are cured and chilled, and assembly is not part of the class, though you will be able to ask questions at the next class or between classes.
Useful tools:
- Clay machine. If you have or can borrow one, it will be very handy. If you do not, it’s probably not worth buying unless you continue working with clay. (https://www.michaels.com/amaco-craft-clay-machine/10353617.html)
- Cookie cutters of any shape to cut your jewelry: circle or oval cutters will work for pendants, brooches, or earrings, but you also can cut clay with a knife or shape it with your hands like play dough.
- Cling wrap.
- Students who wish to make round beads for necklaces should have toothpicks and aluminum foil.
Household oven is sufficient to cure the clay used in the class.
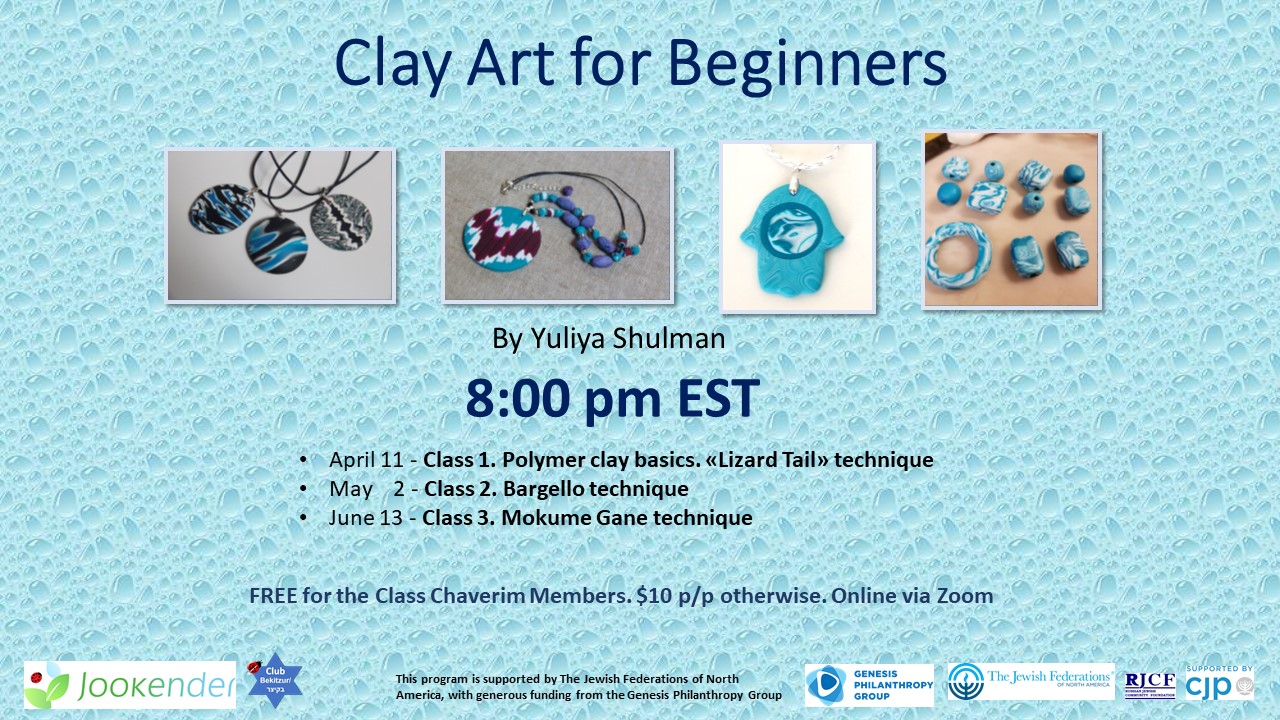
Class 1. Polymer clay basics. «Lizard Tail» technique
You will learn the basics of working with polymer clay: different types of clay, conditioning, rolling, shaping, curing, and clean-up.
You will make objects in technique called «Lizard Tail».
- Class time: 1 hour 30 minutes
Additional time:
- Oven time: 30 minutes
- Finishing time: 30 minutes – attach bails and cords, glue pin backs.
Class 2. Bargello technique
This technique resembles needlepoint embroidery consisting of upright flat stitches laid in a mathematical pattern to create motifs. The name originates from a series of chairs found in the Bargello palace in Florence, which have a "flame stitch" pattern.
You will learn how to create this pattern and make objects in Bargello technique.
- Class time: 1 hour 30 minutes
Additional time:
- Oven time: 30 minutes
- Finishing time: 30 minutes – attach bails and cords, glue pin backs.
Class 3. Mokume Gane technique
It’s a fun and easy technique that creates unexpected multi-colored designs.
No new tools are required for this class, yet, it is very much recommended to have some cookie cutters and/or a flexible blade. I you have a paintbrush or any other stick suitable for poking holes in clay – great, it will be useful.
- Class time: 1 hour 30 minutes
Additional time:
- Oven time: 30 minutes
- Finishing time: 30 minutes – attach bails and cords, glue pin backs.
Zoom link will be sent at the day of the event or the day before.
Registration for the Clay Art for Beginners program closed.
If you have any questions, please address them to Sasha via email jookender@gmail.com